


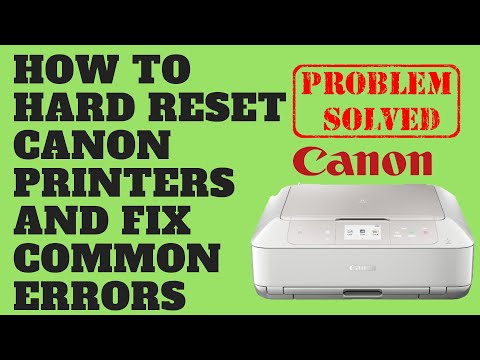
Khôi phục máy in Canon TS9120: Thần tốc cải thiện hiệu suất và độ chính xác!


Reset Canon TS9120 Printer là một quy trình giúp thiết bị in Canon TS9120 trở về trạng thái ban đầu và loại bỏ các lỗi hoạt động. Khi máy in gặp sự cố như ngưng hoạt động, báo lỗi mực in, không nhận giấy hoặc gặp những sự cố khác, việc thực hiện Reset sẽ giúp khắc phục tình trạng đó.
Để thực hiện Reset Canon TS9120 Printer, bạn có thể làm theo các bước sau đây:
1. Đảm bảo máy in Canon TS9120 được kết nối với nguồn điện và máy tính của bạn.
2. Mở khay giấy và kiểm tra xem có giấy trong khay không. Nếu có, hãy loại bỏ giấy đi.
3. Nhấn và giữ nút “Power” trên máy in. Trong khi giữ nút này, nhấn và giữ nút “Stop” (có hình biểu tượng tam giác ngược) trong khoảng 5 giây. Sau đó, bạn có thể thả nút “Power” nhưng tiếp tục giữ nút “Stop”.
4. Đợi cho đến khi màn hình hiển thị “Idle” hoặc “Ready”. Khi thấy hiển thị này, bạn có thể thả nút “Stop”.
5. Máy in sẽ thực hiện quy trình Reset và sau đó sẽ khởi động lại.
Sau khi hoàn tất Reset, máy in Canon TS9120 sẽ trở về trạng thái mặc định và sẵn sàng hoạt động trở lại. Bạn cũng có thể thử in một tài liệu thử để kiểm tra chất lượng in ấn của máy.
Nếu máy in vẫn gặp sự cố sau khi thực hiện Reset, bạn nên liên hệ với dịch vụ khách hàng Canon để được hỗ trợ kỹ thuật và tư vấn giải quyết vấn đề.
Download phần mềm reset Canon TS9120
LINK TẢI GG DRIVE: LINK TẢI 1
LINK TẢI GG DRIVE: LINK TẢI 2
LINK TẢI GG DRIVE: LINK DỰ PHÒNG
Liên Hệ lấy Key/Pass Reset Canon TS9120


Video Cách thực hiện khôi phục cài đặt gốc máy in Canon và khắc phục các lỗi phổ biến Trên Youtube
have encountered a problem with your Canon printer. This process allows you to restore your printer to its original factory settings, which can help resolve common errors and issues.
To perform a hard reset on your Canon printer, follow these steps:
1. Make sure your printer is turned ON, and if it’s connected to your computer, disconnect the USB cable.
2. Locate the power button and hold it down for at least five seconds until the printer turns off.
3. Once the printer is completely turned off, unplug the power cord from the back of the printer.
4. Wait for approximately two minutes and then plug the power cord back into the printer.
5. Press and hold the power button for at least five seconds until the printer turns on.
6. Wait for the printer to go through its startup process. This may take a few minutes.
7. After the startup process is complete, try printing a test page or performing any other tasks to check if the problem has been resolved.
By performing a hard reset, you are essentially refreshing the printer’s internal settings, which can often fix common errors such as paper jams, slow printing, or connectivity issues. However, keep in mind that a hard reset will also erase any custom settings or preferences you have previously set on the printer.
If the hard reset doesn’t fix the issue, you may need to consider a factory reset. The factory reset option will erase all settings and return your printer to its original state when you first purchased it.
To perform a factory reset on your Canon printer, follow these steps:
1. Turn off your printer and unplug the power cord.
2. Press and hold the “Stop” button while plugging the power cord back into the printer.
3. Continue holding the “Stop” button for at least five seconds until the printer’s indicator light starts blinking.
4. Release the “Stop” button and wait for the indicator light to stop blinking.
5. Once the indicator light stops blinking, turn on the printer.
Performing a factory reset should be done as a last resort, as it will remove all custom settings and preferences, as well as any wireless network information that was previously saved on the printer.
In conclusion, performing a hard reset or factory reset on your Canon printer can help resolve common errors and issues. Before doing a factory reset, make sure to try a hard reset first, as it is a less extreme option that may solve the problem. If the issue persists, you can proceed with a factory reset, but keep in mind that you will lose all custom settings and preferences.
#Video How to Hard Reset Canon Printers and Fix Common Errors trên Youtube có thời lượng 4:27 được lấy từ kênh youtube.com/@Britec09. Tính đến thời điểm hiện tại video này đã có 848959 lượt view.
Hướng Dẫn Chi Tiết Cách Reset Canon TS9120
Để reset được máy in Canon TS9120 ta chuẩn bị các bước sau
+ Tải phần mềm Canon service tool tại đây : Download
+ Mật khẩu giải nén file là adjprogram.com.
+ Vào chế độ service mode của máy in Canon TS9120.
Để vào chế độ Service mode Canon TS9120 các bạn làm theo các bước dưới đây
1. Tắt nguồn máy in nhưng không rút điện.
2. Giữ nút Nguồn (POWER).
3. Tiếp tục giữ nút nguồn và nhấn nút STOP 5 lần.
4. Sau khi nhấn đủ 5 lần nút Stop thì thả phím nguồn POWER ra, bạn đợi một chút sẽ thấy đèn nguồn sáng đứng yên mà không nháy nữa.
Video Hướng dẫn Vào Service Mode Khi Reset Canon TS9120

#Lưu ý: Nếu không vào được service mode thì chúng ta không thể reset máy in Canon bằng phần mềm được. Lúc này cần phải thay IC nhớ EEPROM để mở khóa service mode.
5. Mở phần mềm và nhấn vào SET như hình dưới để reset Canon TS9120.


– Sửa lỗi máy in Canon TS9120 bị nhấp nháy đèn luân phiên, không in được, download phần mềm reset tràn bộ nhớ máy in phun màu Canon TS9120 báo lỗi 5B00, 5b01, 5b04, 5b14, 1700 mới nhất , full key đơn giản tiện lợi 1 cách dễ dàng.
Liên Hệ Sửa Máy In Canon TS9120